Gardener's Supply Company

The Worm Factory Composting System Great Gift Idea

The Worm Factory Composting System-5 Tray

Mulch your way to great soil and happy plants

>> Sunday, December 7, 2008

If you have looked at what kind of soil you're working with, how to improve and feed the soil, transplanting young seedlings and watering, then the next thing to consider is how to keep the water in the soil, right where the plants need it.
I think the best way to prevent moisture loss is to mulch. There are so many materials that we can use as mulch, because essentially any material placed over the soil can be called a mulch.
But because we are gardening organically, it's important to make sure that the mulching material we choose is organic and if possible that it has been produced organically.
I like to use a combination of a layer of compost on the soil, covered with a layer of pea straw.

Some of the benefits of using an organic mulch such as pea straw are:

that it slows down evaporation from the soil
need to water less often
it prevents soil erosion
as it breaks down, it feeds the soil
it helps prevent weeds
keeps your plants cleaner
So you can see it really is worth the effort of mulching. I don't even find it that much effort. It kind of tidies up my vegetable garden as it's laid down.

You'll find more detailed information on watering and mulching in Julie's e-book "Organic Food Gardening Beginner's Manual" by clicking here

Read more...

Acid-Loving Plants

Mulch any acid-loving plants with a thick layer of pine needles each autumn (fall). As they break down the soil becomes more acidic.
Something to be aware of though: pine needles exude a substance that prevents many seeds from germinating. That's one reason why you don't usually see other plants growing under pine trees. For more tips, click here

Read more...

Shop Our Most Recent Catalogs Right Here! SHOP NOW!
Help keep your plants happy and heathy!
Park Seed

Read more...

The 10 Easiest Vegetables To Start Growing With

>> Thursday, December 4, 2008

Hey there,

By now I'm guessing you've done quite a bit of work setting up your vegetable garden... well, at least a little work???

Have you worked out what kind of soil you've got? Sorted out where your patch is going?

If you have, then I want to share with you my top 10 easiest vegetables to get started with. From my experiece anyway.

Here they are:

Radish
Silverbeet / Spinach
Capsicum (Peppers)
Cherry Tomatoes
Zucchini (Courgettes)
Pumpkin
Leeks & Spring Onions
Bush or Dwarf Beans
Peas
Beetroot

You need to plant them at the right time of year for your area, but they really are quite easy to grow and are good vegetables to get your kids to grow if you want to get them involved in organic gardening too.

You'll find detailed cultivating information for my top 10 vegetables in my e-manual to get you started. Click here Taken from Julie's 1 Stop Organic Gardening site.

Read more...

Tips On Transplanting Your Established Plants

>> Wednesday, November 12, 2008

Transplanting other plants. They might be plants you've brought home from your local nursery, or bare-rooted trees, or maybe you have an established plant in your garden that you need to move for some reason.
Or perhaps a friend or neighbour wants to give away one of their plants that you'd love to have in your own garden.

These plants can be treated similarly to seedlings, but there are a few pointers to remember that are different. If you stick with these simple steps your plants will reward you with strong, vigorous growth. For more tips on how to successfully transplant established plants, click here

Read more...

Planting Trees

When planting trees, think of them and their locations as the walls and roofs of your outdoor rooms. Always consider their mature size before you plant. For more tips, click here

Read more...

Growing And Saving Your Own Seeds

What wonder is it to plant a tiny seed and see it burst forth into the world? It is one of my greatest joys in the garden.

Collecting, saving and growing your own seed is one of the best skills a gardener can learn. There are many benefits to growing seed that you have saved yourself from the previous season. Some of the benefits are:

It's free - you'll save a great deal of money
Your plants will become more and more suited to your climate
It's very rewarding
You'll have something to exchange with other gardeners
You know that it's been grown organically

There are a few tricks to saving your own seed though. You'll need a basic understanding of plant families, whether they are self pollinated or need cross pollinating, the life cycle of the plant, how long the seed remains viable and how you need to store them.

Saving your own seed really is a great way to save yourself heaps of money and learn about plant cycles.

If you want to know more about saving seed and growing your own seeds, you'll find great information in the e-manual "Organic Food Gardening Beginner's Manual"
Plus one of the bonuses you will get when you buy the e-manual is a stand-alone e-book called Seed Saving Tips & Techniques.

Have a lot of fun growing your own plants from seed.
Taken from Julie's 1 Stop Organic Gardening

Read more...

Planting Seed In Clay Soils

If you're planting seeds in clay soil, cover them with vermiculite or seed-raising mix instead of soil. Clay soils absorb heat and can become too hot for the seeds to germinate. Clay also tends to crust over, making it difficult for the young seedlings to emerge. For more tips and information, click here

Read more...

Easiest Way to Make Compost

>> Saturday, November 1, 2008

You don't need a compost bin to make compost. This is your autumn chore to keep you busy in the winter month using the free materials in abundance from the fall season. You can use your compost on your indoor plants and indoor garden. Plus you can be making the compost for your spring outdoor garden.


Here are the ingredients you need (and they are mostly free):
The carbon rich or "brown" (dry) materials such as the dry fall leaves, straw, dead flowers, dead plants from your garden..

The nitrogen rich or "green" (wet) materials like your grass clippings, plant-based kitchen waste (vegetable peelings and fruit rinds, no meat scraps).

Some garden soil.

A little water.
Some heavy duty trash bags.

Here's what you need to do:
Take 1 trash bag and begin by filling a layer about 3 inches thick of your dry, brown material. Now add a little of your green material. You want a ratio of 3 parts brown to 1 part green. Next add a small shovelful of garden soil. Sprinkle water to moisten the leaves thoroughly. Repeat this layering until bag is near full and can still be tied closed. Tie the bag closed. Now poke some holes near the top and bottom to let oxygen and some water in and carbon dioxide and excess water out. Now mix it all up by shaking or rolling the trash bag. Every few weeks mix again and moisten the leaves if they dry out.
In about 2 to 3 months open and take out the dark, crumbly material. It will look like moldy leaves, technically speaking, it is. But for our sakes we call it "compost". Use it as mulch and a soil amendment and fertilizer for your indoor plants, indoor garden or for next years garden. A little layer on top of the soil will feed your plants, prevent plant diseases, suppress weeds, and conserve water.

Now if this is too slow for you, use black trash bags and set them in the sun during winter to get faster results. You should also shred the materials first and then layer them up. If letting set in the sun, be sure to roll or mix the bag up every few days and keep the mix moist but not soggy. If you notice steam escaping out of the holes you poked in the bag it is a sign the compost is heating up as a result of the materials decomposing.
Your compost is done when it isn't heating anymore and if you cannot identify the materials. It is fine also to use the compost that's not quite finished as mulch for an indoor garden but not in plant potting mixes unless it is fully done to prevent nutrient germination. And screen out any big chunks if you use the compost in a potting mix. Try this sniff test to see if your compost is ready to mix with your potting mixes.
Mix some of your compost and water in a jar until the compost is soggy. Seal jar and wait 1 week. Open the jar. If the compost smells bad, it's not done yet. If it smells earthy, then it's ready to use.

Read more...

How to Start An Organic Garden!

>> Tuesday, October 28, 2008

Is there anything more important than you and your family's health? Then organic gardening is right for you!

Organic gardening does not involve the use of chemical fertilizers.Those harmful chemicals man made which increases the risk of cancers, birth defects, infertility and many other health problems.

Many people know of these problems and yet they do not want to take the time and measures to prevent it. Not until it happens to them. Is money more important than your health?

So don't wait until the problem happens to you and then attempt to prevent it. Take measures now to prevent it before it happens. Go organic now, today!

A fantastic book on how to start your own organic garden NOW with a detailed step-by-step guide, click here <

Read more...

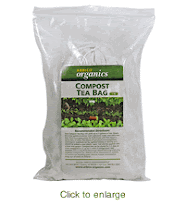
Make a Compost Tea - wikiHow

>> Tuesday, October 14, 2008

Make a Compost Tea - wikiHow

How to Make a Compost Tea


from wikiHow - The How to Manual That You Can Edit

You have worked away at making some perfect compost. Here is a way to make it especially effective to help give plants a special boost or even to give them a quick-fix remedy when they're looking a little nutrient-deficient. Not a tea you want to drink but one that your plants will soak up greedily.

Steps


  1. Check that your compost is ready for use. You can also use partially-composted matter - reach down past the top of the compost to the moist warm stuff below and pull out a handful. This way you don't have to wait weeks or months before making use of your compost.
  2. Get a cloth bag and fill it up with your compost. Size of the bag should be small to medium - so that you can easily lift it when filled with compost.
  3. Soak the filled bag in a watering can, tub, barrel or other outdoor container for 1 - 3 days.
  4. The water should turn a dark chocolate color. Dilute it with new water to achieve a solution that is tea-colored.
  5. Pour on plants thirsty for a boost.
  6. You can re-use the compost tea-bag a few times.
  7. When the bag is no longer producing dark colored water, its nutrients are exhausted and you can tip the solids back into the garden.


Video


A different method of making compost tea.

Tips


  • Use the mixture on both indoor and outdoor plants.
  • The mixture is suitable for potted plants, plants in garden beds and plants growing elsewhere.
  • Saplings will also get a good boost from this mixture.
  • Use non-chlorinated water or let it sit for a couple of days first.
  • Aeration really helps. You can either hook up an aquarium pump with a hose or shake the container of water enough to produce a froth on the surface.


Warnings


  • None! The compost tea-bag is not toxic and anyone can do it.
  • Well... you probably shouldn't drink the tea. Unless you like tea that tastes like compost!


Things You'll Need


  • Compost ready for use
  • Cloth bag (about library bag sized or under)
  • Watering can or container for soaking bag in


Related wikiHows


Article provided by wikiHow, a collaborative writing project to build the world's largest, highest quality how-to manual. Please edit this article and find author credits at the original wikiHow article on How to Make a Compost Tea. All content on wikiHow can be shared under a Creative Commons license.


Read more...

How to Build an Organic Compost Pile Indoors During the Winter

>> Monday, October 6, 2008

Vermicompost is the best organic compost fertilizer you can make. This organic compost uses worms to make the compost. This process is the fast way in the winter months as the worms are aiding in the compost. Without the worms, one would be making organic compost by the outdoor method, only in-doors and possibly taking several months. It will be ready for spring gardening anyway. The organic compost you can make with worms in the winter can be ready in about 6 -8 weeks.
To get started you need 3 main ingredients: worms, a container or bin and "bedding". The Bin: The size of the bin should be according to your household's kitchen scraps. One or two people usually produce about 4 lb of food waste a week: use a 2ft x 2ft box 8" deep. For three people make it 12" deep, for more, 2ft x 3ft x 12" deep -- or two 2-person bins might be better, because bigger ones can be too heavy to move when full. The bins need a lid or cover. Ideally, the best bins are the Rubbermaid type plastic storage bins. But if you are handy, you can build one out of wood as well. For a small size, a 5 gallon bucket with a lid works well. Do not use any container that has had chemicals and toxins in them. Drill or punch enough holes in the bottom for light drainage or seepage, and on the sides for more ventilation. Use old bricks or a few pieces of wood to raise the bin off the floor for circulation. Place a tray or plastic under the bin the catch any seepage. Location is important. Ideally your worm compost bin should be where the temperature ranges between 40 to 80 degrees Fahrenheit. The red worms generally prefer temperatures between the 55 to 77 degree range. Many people use a corner of their kitchen, or, if they have a balcony or patio the worm bin can be outside, preferably in the sunshine and where it does not get chilly in the winter, or move it inside for the cold months.
The Bedding: Once you have made your bin, the compost layering, or bedding, will be similar to composting outdoors. Now, put about a foot of damp bedding made from any of these: shredded leaves, dried grass clippings, sawdust, and black topsoil, into the container to serve as a living space for the red worms. You can also use shredded cardboard and newspaper (must have non-toxic ink) as bedding material. Whatever material you choose, it has to be as moist as a wrung-out sponge and is no less than 8” deep. Proper bedding will take up anywhere from one-third to one-half of your bin. Save a bag of leaves, preferably mulched finely, to cover your kitchen scraps as they are added to the compost bin throughout the winter.
Add kitchen food scraps, tea bags, coffee grounds and coffee filters, ground egg shells, fruits and vegetables, peels, cores, breads, rice, pasta, and beans. Avoid meat scraps, fish bones, dairy products, potato peelings and garlic. Watermelon rinds can be difficult. You can set a small coffee can under the sink for scraps and empty it every 3-4 days into the compost bin.
The Worms: You will need red worms -- Eisenia foetida, also known as red wigglers, brandling or manure worms or Lumbricus rubellus which are manure worms. Many garden centers now supply them, and in most countries they can be bought by mail order from worm farms. Vermicompost consists mostly of worm casts (poop) plus some decayed organic matter. Worm casts contain five times more nitrogen, seven times more phosphorus, and 11 times more potassium than ordinary soil, the main minerals needed for plant growth, but the large numbers of beneficial soil micro-organisms in worm casts have at least as much to do with it. The casts are also rich in humic acids, which condition the soil, and have a perfect pH balance. Do not try using your garden-variety night crawlers. Some recommend a one-to-one ratio -- one pound of worms for one pound of garbage, while others recommend two pounds of worms for every pound of garbage. A pound of red wrigglers can consume half a pound of organic waste a day. Worms multiply rapidly and with proper feeding and a good home, they can double their population about every ninety days. Start out slow and with fewer worms than you think you'll need and the resulting worm population explosion will take care of the rest.
Worm casts have a pleasant, earthy smell, like forest soil. If the compost bin begins to smell, you have too much feed in it, more than the worms can process. Stop feeding the worms the kitchen scraps. Let me pile up in a small air tight container until needed. Add more dry bedding and stir the bin gently with your hands (using gloves). Just repeat until the smell is gone.
Don't let the vermicompost dry out before using it -- it loses a lot of its value. If you want to store it, don't use an airtight container and it will keep for a year or more. Use this rich organic compost fertilizer for your indoor house plants, herbs, indoor garden or store for use in your spring garden.
Organic composting and fertilizer is one more area of our lives to be green minded. We can do our part to keep organic waste recycled at home and avoid over-filling the landfill which uses non renewable energy. For more tips and step by step information on organic gardens and organic composting, Click Here!

Read more...

How to Make Organic Compost Fertilizer

Making compost is a process of cultivating living micro-organisms. These micro-organisms must have 4 ingredients to flourish and produce a nutrient rich fertilizer or mulch. These 4 are oxygen or air, water, nitrogen, and carbon. Nitrogen rich materials are the “green” or moist materials such as fresh grass clipping, leaves, and most other alive landscape substances. Carbon rich materials are the “brown” or dry materials such as dry twigs, leaves, hay, and straw etc. Just keep a note that the greens will be alive and moist and the browns are all things dry. Water will used to wet down each layer of the pile and air or oxygen is added when the pile is turned providing air pockets by not allowing the pile to compress and compact. Many materials are bio-degradable but for organic fertilizer, it must not have any chemicals.
There is not a set method of building an organic compost pile. Piles are built in layers to ensure the proper proportion of nitrogen to carbon, and water and air. Then the layers are thoroughly mixed or “turned”. Begin by selecting the area for your compost pile. If possible, a location with as much sunshine will be best. Next, lay a bed a few inches or so thick of dry straw. Begin mixing in one part greens organic matter with two parts brown organic matter. Spread vegetable, fruit and food scraps near the center. Continue adding your mixture of organic matter as the weeks go by. Fresh materials may be added but should be buried inside the pile to speed composting. It is better to add fresh materials to a new pile. You determine the size you want. (Many of the materials can even be stored in trash bags to be used later or for making winter compost.) You will know your compost pile is working if you feel there is heat. Turn the compost pile from every 3 days to every 6 weeks with a pitchfork or shovel. This turning provides the oxygen necessary for decomposition. Turning the pile will maintain the temperature, allowing all the material to benefit from the heat. If you have odors, organic composting lets you know your pile is too damp or is lacking oxygen, and that more frequent turning is necessary. Frequent turning will result in a faster composting. Add a little water if pile is too dry or does not feel warm to hot, especially in dry weather. You can cover the pile with some black plastic or tarps to reduce watering as the water from the “greens” will be released from heating up.
This is active organic composting and should be ready to use in six weeks to eight weeks. The compost will be ready to use when the pile will no longer generate heat. Compost is ready to use when it has an earthy smell and a dark crumbly appearance. (Passive organic fertilizer is allowing the compost pile to decay on its own without tending, turning, etc, and may take up to 8 months to 2 years. Many factors involved here.) Even in active organic composting, one method may be faster than another. But a variety of techniques will work well too. For more information and free organic composting reports, Click Here!

Read more...

What Are The 4 Necessary Ingredients for Organic Compost?

>> Saturday, October 4, 2008

To produce a successfully nutrient rich organic compost pile, you will need 4 ingredients. These 4 are classified as greens, browns, water and oxygen. With the current move to be green minded in all areas of our lives, organic composting is a natural step in that direction.
Since it has been actively going on since the beginning of nature with its laws, there must be value in it today for us. Recycling of what we consider waste is now more than ever starting to make us look for alternatives. There have always been the avid organic farmers and gardeners, but in our generational period today, we have witnessed it to be a fad that comes and goes, and the lie that it is only practiced by hippie, gypsy, all natural, back the earth type folks. It has progressed from being a fad to an environmental move as a respectable thing to do and now being practiced by people from every aspect of life. Apartment dwellers, condos and townhouse renters and owners are finding the ways easy to do even without a plot of land. So if you are planning on organic composting, you will need these 4 ingredients:
The greens: the nitrogen rich substances such as fresh grass clippings, fresh leaves and twigs, vegetable and fruit trimmings, coffee grounds and filters, kitchen food scraps, as well as manure from non meat eating creatures. Organic material that retains some of its moisture in it is considered green material.
The browns: the carbon rich materials which are the dry substances that have already released their nitrogen. Dry leaves and grass, straw, wood chips, and corn stalks are all carbon rich.
Water - the pile needs water for the correct moisture level. The proper moisture should be about the same as a damp rag. A few drops should fall when you squeeze a handful of the compost.
Air - All the organisms and micro-organisms, bacteria, fungi, and insects that are working in the pile to breakdown the organic material, need oxygen to breathe and air space in which to move throughout the pile.
The proper ratio and mixture will be dependant upon what materials will be available to you in what quantities. The best way is too just start composting. Learn as you go and you will gain the experience needed to be able to determine quality organic compost.
For more information on organic composting and gardening, please click on the recommended authors resources listed here. Enjoy

Read more...

Hello and Welcome

Hello all, I desire this blog to be a place where I can review and then promote authors of organic gardening and organic composting that have the actual experience of what they write about. These authors are living the example and then put their experiences down in writing to shorten our learning curve. As I go through their books and put into practice what they teach me, then I too will be able to write an ebook. Until then, please support these authors I have found to be worthy.

Read more...

Why Make Compost?

>> Friday, October 3, 2008

This is just part 1 of the 3 part free Why Make Compost? guide. Get all 3 parts yourself now if you want by Clicking Here!
Here is part 1:

There are so many benefits to creating your own compost, so I think it’s worth the effort. Here are 6 reasons why.
1. Where-ever you make your well made compost heap it will get so hot that the soil
underneath it ‘burns’, along with any weeds – so it will even kill Couch or Kikuya
grass. Native soil life can bury down under the hot surface area to survive. Enough
nutrients leach down into the soil under the heap for them to feed on. This area
under your compost pile becomes a very fertile, cleared planting bed – too good to
waste by building the next compost pile in the same place. Consider building your
next compost pile where you want your next planting area.
2. It gives an initial quick boost to the population of soil micro-organisms when you
are first establishing an area. Using compost to plant out (at least for the first time)
provides your garden beds with starter cultures of micro-organisms.
3. To create your own seedling raising and potting mixes. Combined with worm
castings and river sand, compost based seedling raising mix has the right texture,
water retaining and draining qualities and is nutrient-rich enough to give seedlings
and cuttings a great start.
4. To provide additional nutrients in the garden when planting out heavy feeders
following another heavy feeder.
5. To incorporate organic matter into the garden that isn’t suitable for feeding to the
chooks. So many household and garden materials can go into creating wonderful
nourishment for your plants that would have to be otherwise disposed of. By
turning it into compost instead, you are greatly reducing the burden on the
environment and keeping yourself fit in the process.
6. Compost is often used as a nutritious layer of mulch, reducing evaporation and
helping keep weeds at bay.
For part 2 and 3 just Click Here!

Read more...

Fast Organic Gardening!

No matter what people say about organic gardening, there's nothing more important than you and your family's health.
As you may have knew or guessed it, organic gardening does not involve the use of chemical fertilizers which reduces the risk of Cancer, Birth Defects, Infertility and many other health problems.

Many know of such problems but they do not want to prevent it UNTIL it happens to them. Sad, isn't it? You may argue that money is important than health or equally important.

What I'm trying to convey is, don't wait till the problem happens to you and then prevent it but prevent it before it happens to you. I hope I'm not confusing you. That is why I would say go organic now.

I can't stress the importance with words.

To learn how to start your own organic garden with detailed step-by-step guide within weeks, Click Here!

Read more...

Free Composting Guide

You can get a free composting guide and informative organic gardening articles by email. Just go to their website and sign up for free. There is alot of good material on organic composting and organic gardening from Julie Villani. She writes from her own experience so your learning curve is shortened. Help support those who bring their experience to you! Check out her website by clicking here!

Read more...

Organic Gardening at Home: Why?

>> Tuesday, September 30, 2008

With the move in all areas of our lives today to become more and more self sufficient and relying less and less upon non renewable energy resources, organic gardening has seen a tremendous re-discovery that has not been seen before. In the past century, it has been more or less a fad that has definitely come and gone many times. But today, the move is more of a way of sustainable living and not a fad anymore. With rising food costs, less quality, less nutrients, and the many “scares” taking place of un-healthy and tainted foods, we are now paying more serious attention to the availability we all have of growing a lot of our own food.
So why go organic gardening?
The main reason should be for a higher quality of food.

When you are the gardener, you will know the quality of the food you are growing. Fresh food, rich in vitamins and minerals, will be harvested at the best stage of their maturity.
Another reason is your choice not to apply synthetic chemicals, fertilizers and pesticides that are both unsafe and detrimental to the health of you and your family. Enjoy the selfish reason that you want to enjoy your food without all those harmful ingredients.
Organic gardening helps the environment. One, you are not using harmful chemicals, and two; you are replenishing the quality locally of where you live on Earth. You help the environment by not purchasing those chemicals that affect the natural resources we have in the soil, water, air, and vegetation.
Save money on food bills. Take note of what you purchase at the grocery store and you will find you have plenty of food that you could grow. Today, many are trying to find ways to reduce their vehicle fuel and utility bills, and here is yet another way to save money. This is a lot easier than one thinks.
Make money? Why, yes. If you over produce, why not sell the rest? Farmers markets are increasing each year. Roadside stands have always been popular in rural areas but are springing up in residential areas everywhere. The desire of many that just do not have the time to have their own organic garden, make it a point to purchase organic garden vegetables from those grown locally.

Questions concerning the how to’s of organic gardening can be found on abundantly on the internet. I recommend these materials on my blog from those who have "been there and doing that" NOW. Help support them by purchasing their information. Their knowledge and time spent in experience and in writing the information down for us is invaluable.

Read more...

Shop for our Internet specials, new product previews and great gardening tips.

Park Seed

Master Gardener Potting Bench

Master Gardener Potting Bench This innovative new bench is built to last a lifetime. Plenty of room for working and storage. It's a functional piece that will add character and beauty to any indoor/outdoor area.

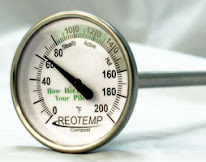
Compost Thermometer

Compost Thermometer
Heat plays an important role in the composting process and for that reason a compost thermometer is crucial. This thermometer will ensure that the proper temperature is obtained and maintained.

Complete Composting Set FAST and EASY

Ultimate Composting Set

  © Blogger template Sunset by Ourblogtemplates.com 2008

Back to TOP